This page describes several conventional approaches to structuring roles and teams to secure a multi-tenant Octopus instance. Using the permissions system in Octopus, you can configure internal team members with different roles who interact with tenants in different ways. You can also configure Octopus to provide access for your external customers. This page explores several of those roles for both internal and external parties.
To get the most out of this guide you will need to understand how to manage users and teams and how to work with custom roles. Octopus provides an expressive permissions system, and you can customize the security configuration to your particular scenario.
Account manager
Toby is a member of the sales team for Vet Clinic and manages the relationships for several of the largest customers. In his role Toby:
- Is the main point of contact for specific tenants.
- Manages the details/variables of particular tenants and keeps them up to date.
- Works with customers to deploy releases to their environments on their behalf.
Toby needs two built-in roles:
| Built-in role | What it gives Toby |
|---|---|
| Deployment Creator | Deploy existing releases and run runbooks, and view the projects, releases, lifecycles and tasks involved. It cannot create releases or edit the deployment process. |
| Tenant Manager | View and edit tenant details, variables and tags. |
Step 1: Configure the account managers team
-
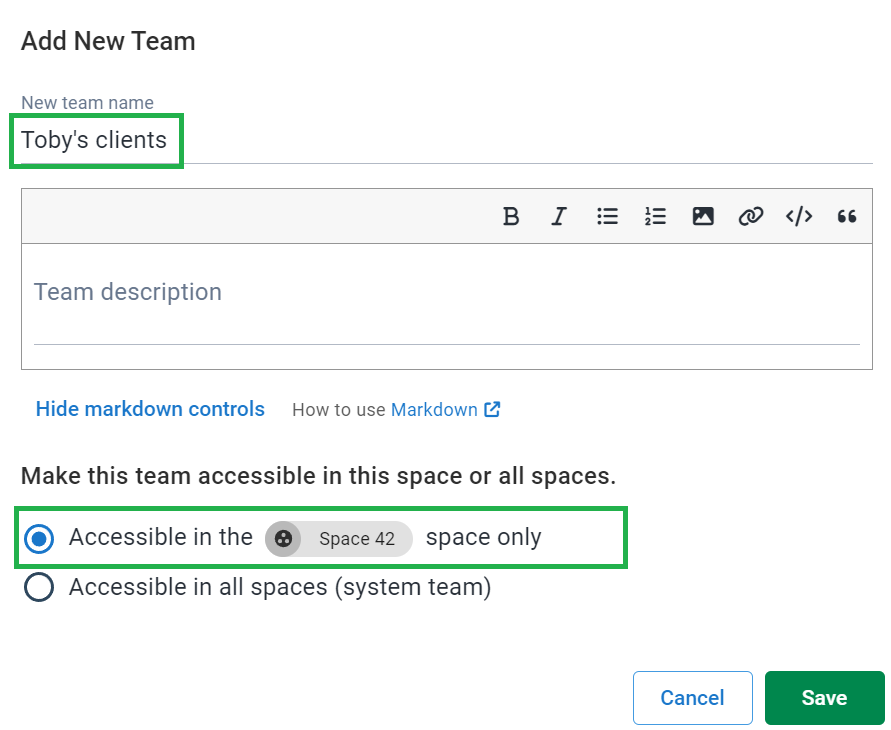
In Configuration ➜ Teams click Add team and call it Toby’s clients. Be sure to select “Accessible in the X space only” unless you have tenants spread over multiple Spaces and then click Save.
-
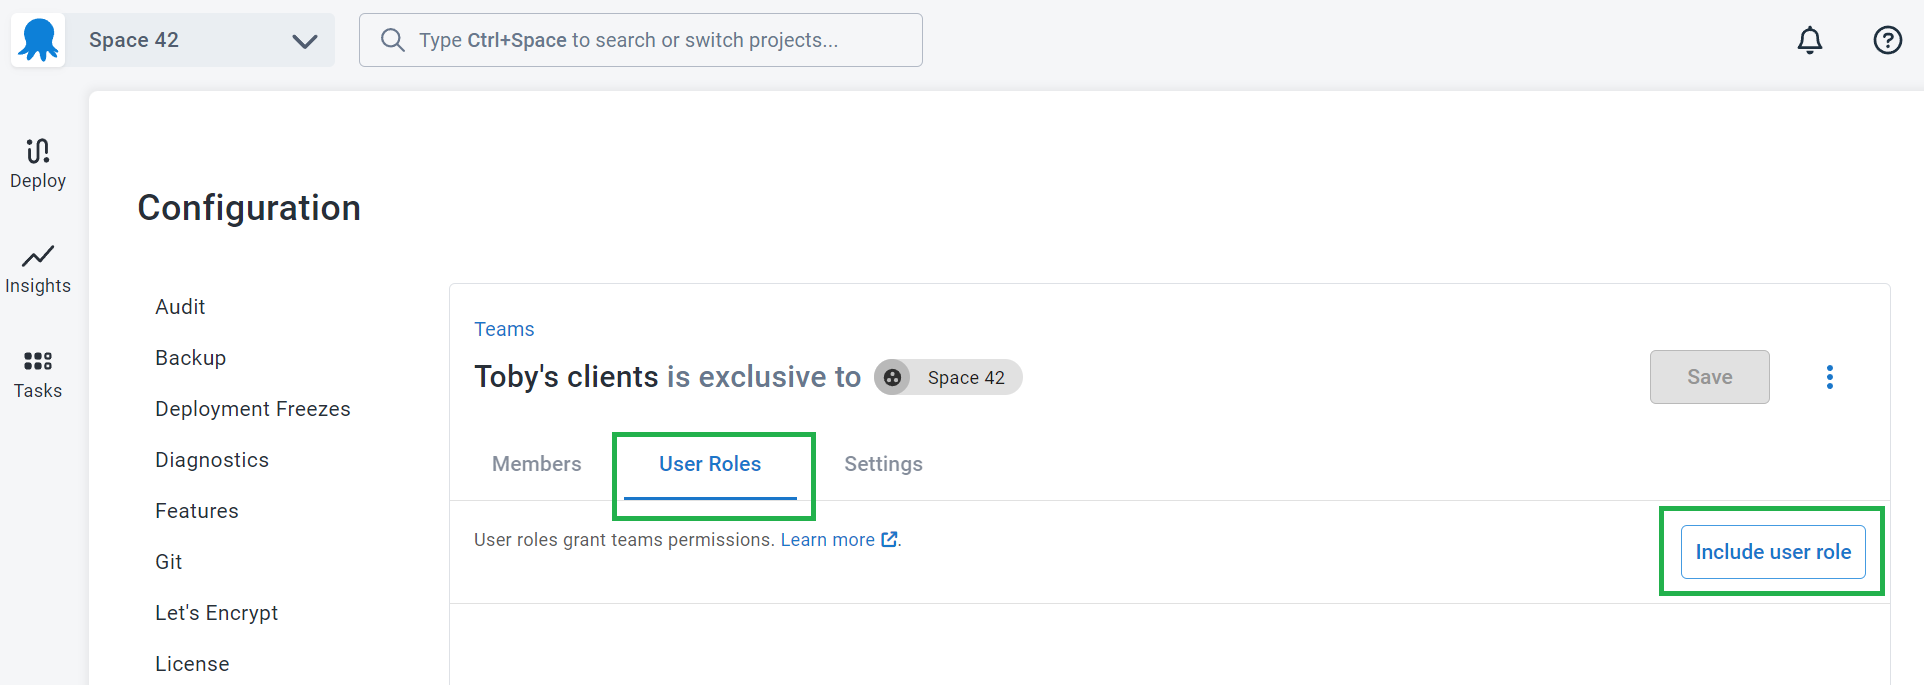
Navigate to User Roles and click Include user role.
-
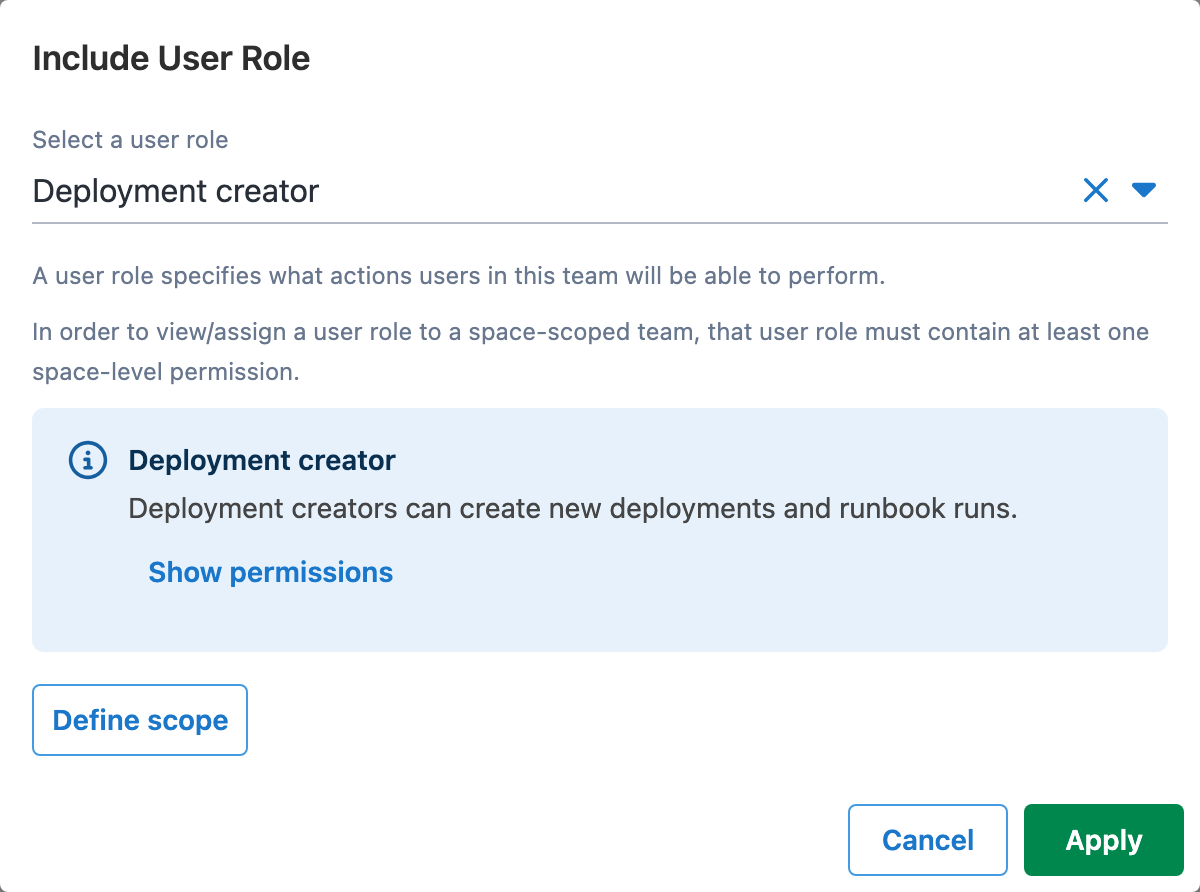
From the dropdown, select Deployment Creator. Before saving, click Define scope and select the tenants Toby is responsible for: Midland Veterinary and Valley Veterinary Clinic.
-
Repeat for the Tenant Manager role, scoped to the same tenants.
-
Navigate to Members ➜ Add member and add any user accounts that will form part of this team.
Scope each role as you include it. Until a role is scoped, the team holds it over every tenant in the space, including the ability to edit tenant variables. Use Define scope on the Include User Role screen rather than adding the role and narrowing it afterwards.
To change the scope of a role already on a team, click the overflow menu (.) next to it and select Edit.

Select the tenants and click Apply.

Tenant Manager can create and delete tenants, not only edit them. Scoping the role limits which tenants Toby can edit and delete, but TenantCreate cannot be scoped to tenants — anyone with Tenant Manager can create tenants in the space.
To let Toby edit tenants without creating or deleting them, create a custom role containing TenantView and TenantEdit, and include that in place of Tenant Manager.
Deployment Creator does not include the permissions to respond to a manual intervention or cancel a running task. If Toby needs those, create a custom role containing InterruptionView, InterruptionViewSubmitResponsible and TaskCancel, and scope it to the same tenants. Add VariableView if he also needs to see project variables on the deployment screen.
Infrastructure manager
Bob is a member of the IT infrastructure team for Car Rental, and he manages all the virtual servers for the different regions in the cloud. His only interaction with tenants is to associate them with the appropriate deployment targets and environments. He should have read-only access to the tenant details he needs, and the ability to manage deployment targets and accounts.
Bob needs two built-in roles:
| Built-in role | What it gives Bob |
|---|---|
| Environment Manager | View and edit infrastructure: environments, machines, workers, proxies and accounts. |
| Project Viewer | Read-only access across projects, including viewing tenants. |
Step 1: Configure the tenant environment managers team
- Create a new team called Tenant Environment Managers.
- Include the Environment Manager and Project Viewer roles.

- Add any specific tenant or environment scoping that makes sense.
- Add any specific members.
To give Bob visibility of tenants without the rest of the read-only project access, create a custom role containing TenantView and include it in place of Project Viewer.
Scoping this team to tenants does not limit Bob’s infrastructure access. EnvironmentCreate, EnvironmentEdit, EnvironmentDelete, the MachinePolicy and Proxy permissions, and TargetTagAdminister cannot be scoped to tenants, because the resources they govern are not tenant-specific.
Tenant scoping limits which tenants Bob can see. It does not limit what he can change about the infrastructure those tenants deploy to.
Self-service
OctoPetShop has development teams that work concurrently. These teams deploy to Development in upwards of ten times a day and need the autonomy to deploy themselves.
Step 1: Configure a team for the tenant
Firstly we need to create a team with a scope limited to the single tenant.
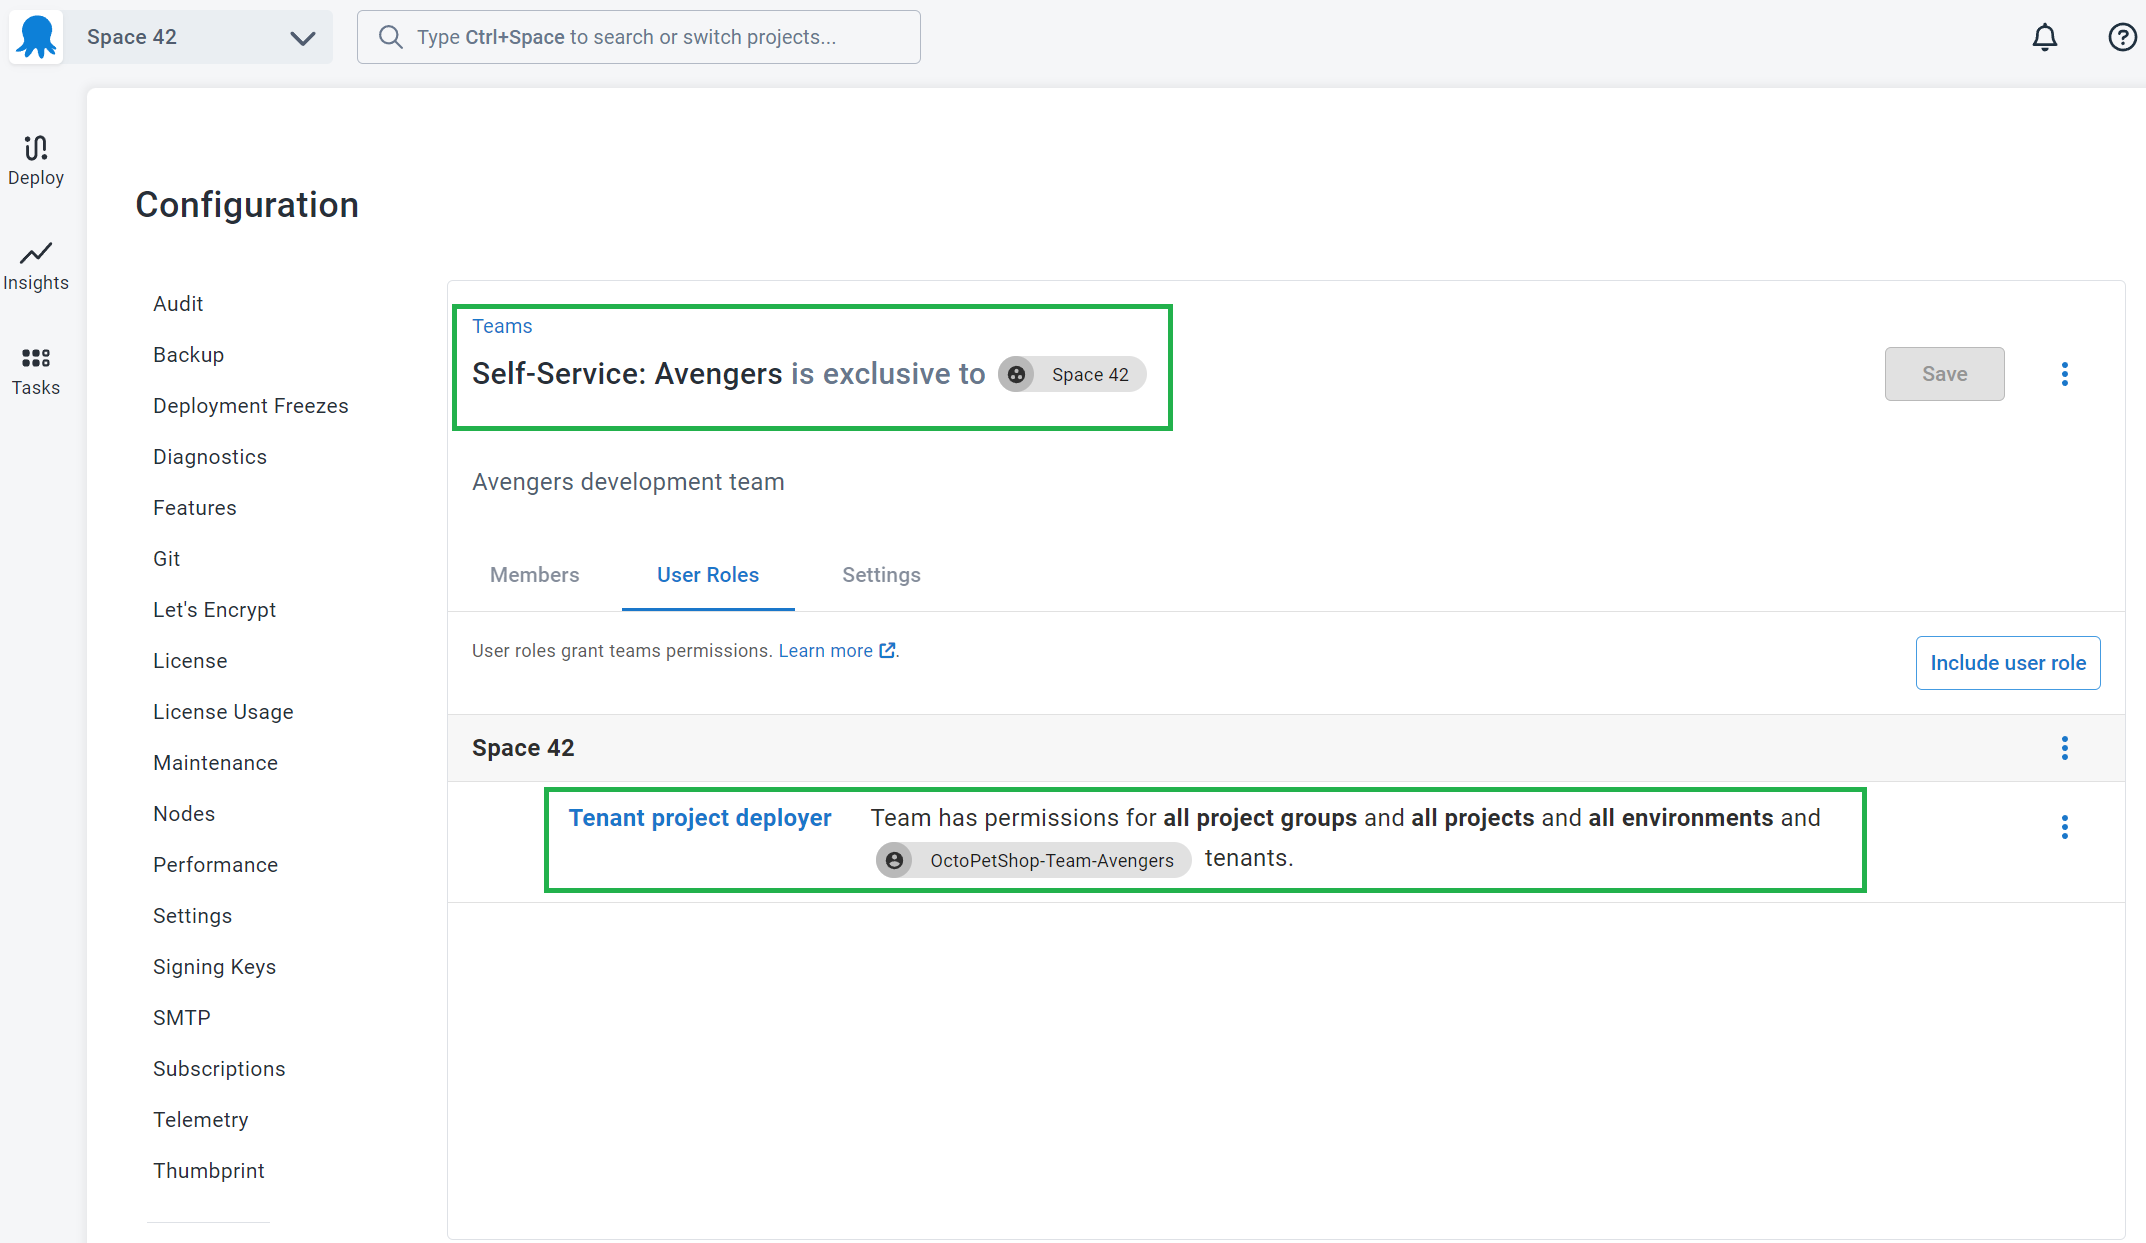
- Create a new team called Self-Service:
like Self-Service: Avengers in our example. - Add any roles you desire. In our example, we’re providing the tenant with the Deployment Creator role, scoped to their tenant.
- Scope the team to a single tenant: